Managing Upgrades
Kestra evolves quickly. This page explains how to upgrade your installation.
How to upgrade Kestra
To upgrade Kestra, follow these steps:
- Perform a database backup (optional but recommended).
- Read the release notes to understand the changes in the new version.
- Perform a rolling upgrade of Kestra components. For Kubernetes, upgrade the Kestra Helm chart as described in “Rolling upgrades in Kubernetes,” below.
- Apply any actions noted in the release notes (for example, update configuration files or adjust deprecated features).
How to rollback Kestra to a previous version
Sometimes you might need to roll back Kestra to a previous version. Follow these steps:
- Perform a database backup (optional but recommended).
- Stop all Kestra components.
- Restore from a backup.
- Restart with the older version.
Check the Backup and Restore section for more information on how to backup and restore Kestra, and Maintenance Mode to pause your Kestra instance for maintenance, upgrade, and backup tasks.
We strongly recommend avoiding downgrades. To prevent surprises, test the new version in a non-production environment before upgrading. If you must roll back, closely follow the steps above.
Where you can find the release changelog
You can find the changelog on the main repository’s Releases page. It lists changes, new features, and bug fixes for each release, as well as any breaking changes. For a high-level overview, see the release blog posts.
How to identify breaking changes in a release
In addition to bug fixes and enhancements, the release notes include a Breaking Changes section. It lists changes that may require adjustments to your code or Kestra configuration, with links to migration docs.
The Breaking Changes section appears at the end of the release notes. Review it before upgrading.
How to minimize downtime when updating Kestra
If you run Kestra as separate components, you should:
- Stop the executors and the scheduler
- Stop the workers — a graceful shutdown waits for active jobs to finish. The default is
kestra.server.terminateGracePeriod = '5m', configurable in your Kestra configuration. - If the job finishes within five minutes, the worker shuts down immediately. Otherwise, the task is killed and restarts when the worker restarts.
- Stop the webserver (and the indexer if using EE with Kafka).
All components support graceful shutdown, so no data is lost. Afterward, update and restart everything in the opposite order (or in any order, as components are independent).
The webserver hosts the API, so stop and then start it immediately to avoid downtime. After that, restart the other components so flow executions can resume.
How to stick to a specific Kestra version
If you want to stick to a specific Kestra version, you can pin the Docker image tag to a specific release. Here are some examples:
kestra/kestra:v0.21.4-no-pluginsincludes the 0.21.4 release with the fourth patch versionkestra/kestra:v0.21.4includes the 0.21.4 release with all pluginskestra/kestra:v0.19.0-no-pluginsincludes the 0.19 release without any pluginskestra/kestra:v0.19.0includes the 0.19 release with all plugins.
You can also create a custom image with your own plugins and dependencies, as explained in the Docker installation.
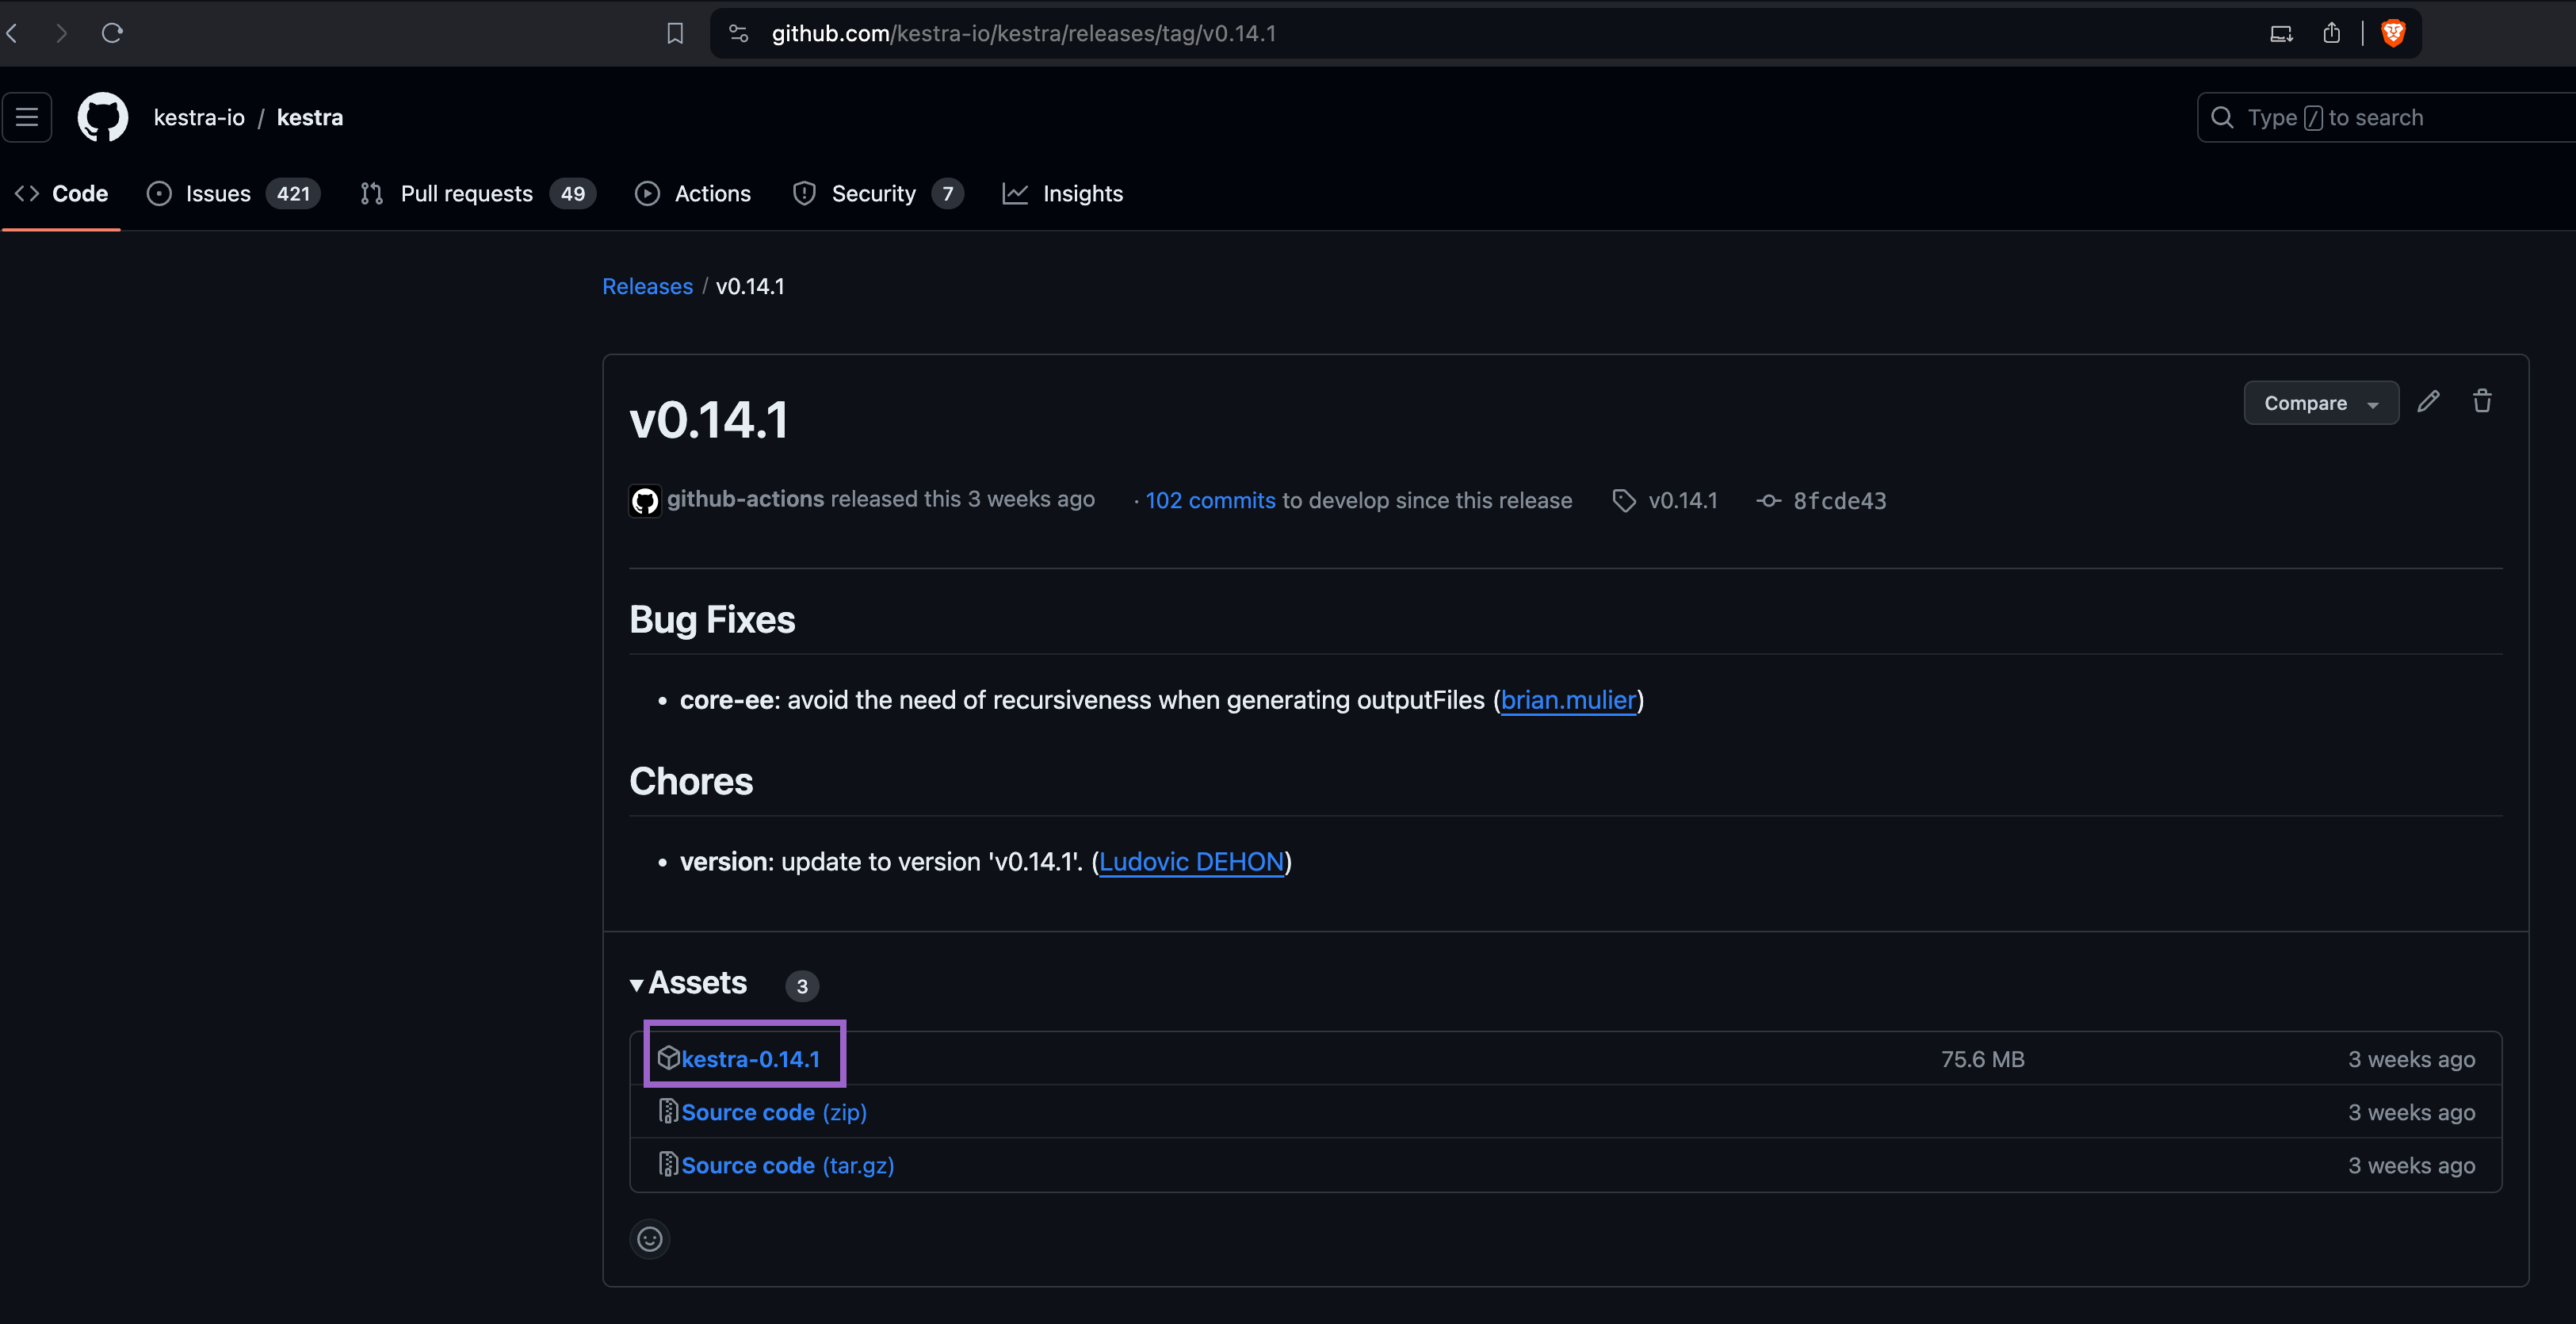
Migrating a standalone installation
If you use a manual standalone installation with Java, you can download the Kestra binary for a specific version from the Assets menu of a specific Release page. The image below shows how you can download the binary for the 0.14.1 release.
Once you’ve downloaded the binary, start Kestra with the following command:
./kestra-VERSION server standaloneMigrating an installation with Docker
If you use Docker, change the Docker image tag to the desired version and restart the container(s) or Kubernetes pod(s).
Docker Compose
If you use Docker Compose, update your compose file to the desired Docker image tag and run docker-compose up -d to restart the container(s).
Migration in Kubernetes using Helm
If you use Helm, set the Helm chart image.tag value to the desired version. For example:
helm upgrade kestra kestra/kestra --set image.tag=v1.0.0For more complex configurations that include multiple changes, consider using a custom values file:
- First, create a
values.yamlfile that contains the settings you want to adjust. - Then, use the
helm upgradecommand with the-fflag to specify your custom values file:
helm upgrade kestra kestra/kestra -f values.yamlRolling upgrades in Kubernetes
Upgrading Kestra on Kubernetes depends on your deployment rollout strategy. Every service can be rolled out without downtime, except workers, which need special attention.
During rollout, each component creates a new pod (the old one keeps running). After the new pod passes health checks, Kubernetes shuts down the previous pod, resulting in zero downtime.
Upgrading workers is more involved because they handle data-processing tasks that can run from seconds to hours. Define the desired behavior for in-flight tasks.
By default, Kestra workers wait for all task runs to complete before shutting down during a migration. You can override this behavior if needed. Kestra Helm charts provide a configuration of a terminationGracePeriodSeconds (set to 60 seconds by default) that allows you to define the amount of time you want to wait before force-killing the worker.
If the worker has no running tasks, or finishes them before the grace period, it shuts down immediately. If the pod cannot finish tasks before terminationGracePeriodSeconds, Kubernetes kills the pod, and those tasks are resubmitted to another worker.
If a worker exits unexpectedly, the executor detects it and resubmits unfinished task runs to a new worker. The same behavior applies when a pod is terminated at terminationGracePeriodSeconds.
Where can I find migration guides
The Migrations section details deprecated features and explains how to migrate to the new behavior.
For all breaking changes, the migration guides are linked in the release notes.
How to stay informed about new releases
You can get notified about new releases in the following ways:
- Subscribe to notifications in the
#announcementschannel in the Slack community. - Follow us on X (Twitter)
- Follow us on LinkedIn
- Subscribe to the Kestra newsletter
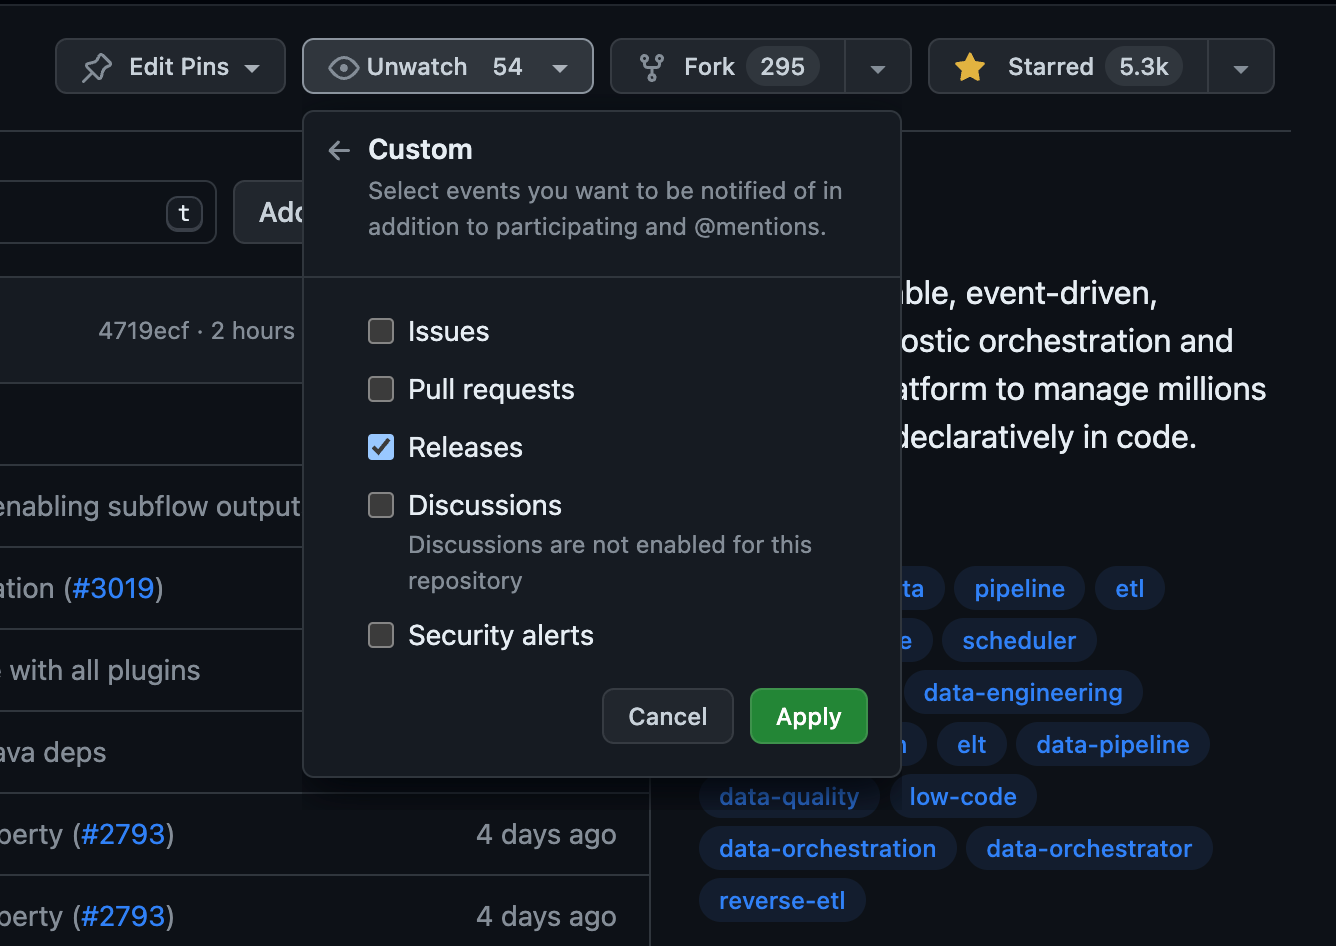
- Subscribe to Release notifications on the main GitHub repository, as shown in the image below:
Database Migrations
There are two types of database migrations: automatic and manual.
Automatic database migration
Kestra uses Flyway to automatically perform database migrations when the server starts. Flyway version-controls schema changes and stores the current version in the flyway_schema_history table. On startup, it compares the current version with the target and runs any required migrations—no manual intervention needed.
Manual database migration
Sometimes a manual database migration is useful, especially when you have a large database and you want to perform the migration before upgrading Kestra to avoid a long downtime.
For example, when migrating from v0.12.0 to v0.13.0, all indexes are rebuilt due to multi-tenancy (tenant_id is added to most tables). With a large JDBC-backed database, this can take hours. In such cases, run kestra sys database migrate manually before starting Kestra.
This command should use the same configuration as configured on your Kestra instance. Depending on whether you deploy Kestra using Docker or Kubernetes, this command can be launched via a docker exec or a kubectl exec command.
There are two ways to initiate the manual database migration:
- Keep Kestra running in an old version. Then, stop Kestra and launch the command on the new version.
- Start Kestra on the new version with automatic schema migration disabled:
flyway.datasources.postgres.enabled=false(if your database is not Postgres, replacepostgreswith your DB type). Then run:kestra sys database migrate.
Example: run the command via docker exec:
docker exec your_container_id bash ./kestra sys database migrate --helpHere is the output of that --help command:
Usage: kestra sys database migrate [-hVv] [--internal-log] [-c=<config>] [-l=<logLevel>] [-p=<pluginsPath>]Force database schema migration.Kestra uses Flyway to manage database schema evolution, this command will runFlyway then exit. -c, --config=<config> Path to a configuration file, default: /root/. kestra/config.yml) -h, --help Show this help message and exit. --internal-log Change also log level for internal log, default: false) -l, --log-level=<logLevel> Change log level (values: TRACE, DEBUG, INFO, WARN, ERROR; default: INFO) -p, --plugins=<pluginsPath> Path to plugins directory , default: ./plugins) -v, --verbose Change log level. Multiple -v options increase the verbosity. -V, --version Print version information and exit.Getting help
If you have questions about the upgrade process:
- If you are a Kestra Enterprise customer, submit a support ticket.
- Or reach out via Slack.
We understand upgrades can be challenging. If you need more help, contact us and we’ll assist with migration based on your environment and use case.